How to export HTML table Data to CSV using only JavaScript?
In this tutorial, we will create a vanilla JavaScript function for exporting (downloading) HTML table data to a CSV file.
While we developing web applications, sometimes, you may need a button to export HTML table data into a CSV file download. If you are searching for how we can create a javascript function to develop export functionality then you are in the right place. let's create this feature using pure JavaScript without using any plugins, modules, or frameworks.
We will follow these three simple steps:
- Step 1: Create an HTML table structure
- Step 2: Create a style.css for creating well looks table
- Step 3: Create a JavaScript function to achieve our goal
Step 1: Create an HTML table structure
<div class="ath_container">
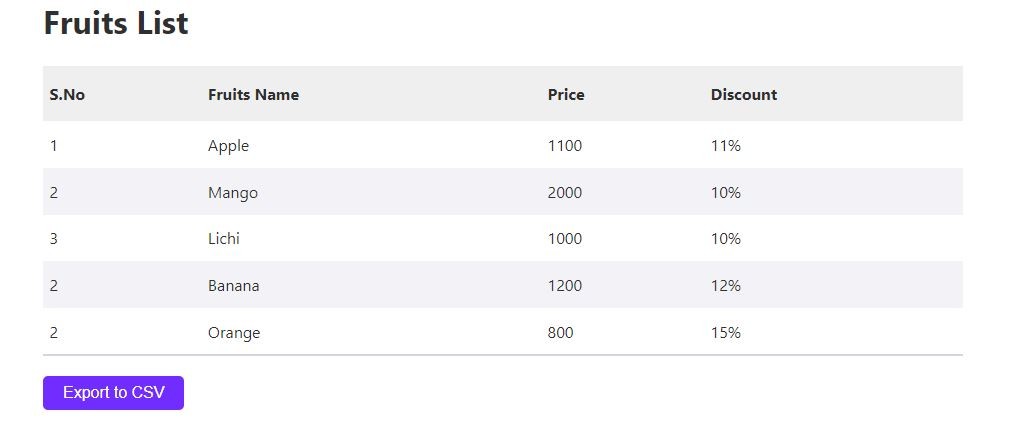
<h1>Fruits List</h1>
<table class="striped" id="table_fruits_list">
<thead>
<tr>
<th>S.No</th>
<th>Fruits Name</th>
<th>Price</th>
<th>Discount</th>
</tr>
</thead>
<tbody>
<tr>
<td>1</td>
<td>Apple</td>
<td>1100</td>
<td>11%</td>
</tr>
<tr>
<td>2</td>
<td>Mango</td>
<td>2000</td>
<td>10%</td>
</tr>
<tr>
<td>3</td>
<td>Lichi</td>
<td>1000</td>
<td>10%</td>
</tr>
<tr>
<td>4</td>
<td>Banana</td>
<td>1200</td>
<td>12%</td>
</tr>
<tr>
<td>5</td>
<td>Orange</td>
<td>800</td>
<td>15%</td>
</tr>
</tbody>
</table>
<div class="row">
<button type="button" onclick="export_html_to_csv_xcel()" class="btn">Export to CSV </button>
</div>
</div>
Step 2: Create a style.css for creating well looks table
                                                    body {
	font-family: -apple-system, BlinkMacSystemFont, Roboto, Segoe UI,
		Helvetica Neue, Helvetica, Arial, sans-serif;
	margin: 0 auto;
	-webkit-font-smoothing: antialiased;
	box-sizing: border-box;
	color: #2f2f2f;
	line-height: 1.5;
}

a {
	text-decoration: none;
	color: #2f20d1;
}

a:hover {
	text-decoration: underline;
}

.ath_container {
	max-width: 920px;
	margin: auto;
}

.ath_container table {
	width: 100%;
	border: none;
	border-collapse: collapse;
	border-spacing: 0;
	border-bottom: 2px solid #d2d6dd;
}

.ath_container table th {
	padding: 1rem 0.4rem;
	text-align: left;
}

.ath_container table td {
	padding: .8rem 0.4rem;
}

.ath_container thead {
	border-top: 1px solid #ededed;
	border-bottom: 1px solid #ededed;
	background-color: #efefef;
}

.ath_container tfoot {
	border-top: 1px solid #ededed;
	border-bottom: 1px solid #ededed;
}

.ath_container table.striped tr:nth-of-type(2n) {
	background-color: #f3f3f6;
}

.ath_container table.striped tr:hover {
	background-color: #f3f3f6;
}

.ath_container .btn {
	padding: 8px 20px;
	font-size: 1em;
	cursor: pointer;
	border-radius: 5px;
	color: #000000;
	background-color: #712cff;
	/* border-color: #ffd98e #ffbe3d #de9300; */
	border: none;
	color: #ffff;
	margin-top: 20px;
}

.ath_container .btn:hover {
	background-color: #cfdb0b;
}

Step 3: Create a JavaScript function to achieve our goal
Now we will create a JavaScript function to retrieve the HTML table data and convert it to comma-separated values. we will use the document object model to access table data in each column of the rows. we will call this function in HTML to CSV download button, when we click on it, it will automatically download a CSV file
                                                    function export_html_to_csv_xcel() {
            var tableElement = document.getElementById("table_fruits_list");
            var sourceData = "data:text/csv;charset=utf-8,";
            var i = 0;
            while (row = tableElement.rows[i]) {
                sourceData += ([
                    row.cells[0].innerText,
                    row.cells[1].innerText,
                    row.cells[2].innerText,
                    row.cells[3].innerText
                ]).join(",") + "\r\n";
                i++;
            }
            window.location.href = encodeURI(sourceData);
        }