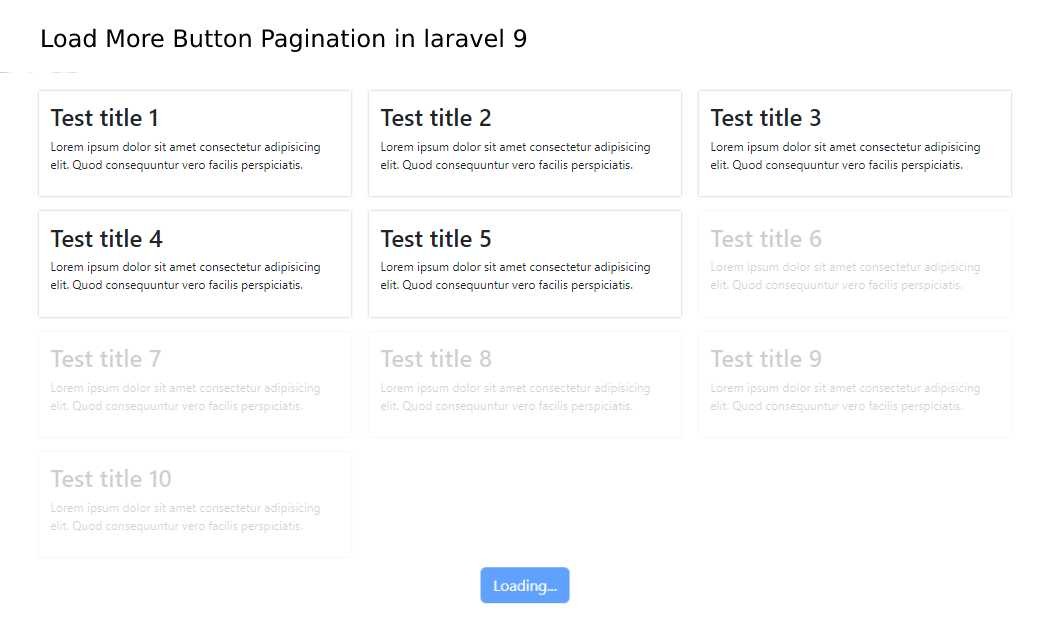
How to Load More Data on Button Click using AJAX in Laravel 9
The purpose of this article is to guide you through the process of creating an AJAX Load More button in Laravel 9, which can also be used in Laravel 8 and 10. With AJAX Load More button, data can be loaded without the need for a page refresh, which can save time and prevent the webpage from crashing when large amounts of data are being loaded.
In this article, we will show you how to create a jQuery AJAX Load More button in Laravel 9 and provide an example of implementing AJAX Load More button pagination in Laravel 8 and 9. This knowledge will enable you to implement flexible and efficient Load More button pagination solutions for your Laravel projects.
You can follow these simple steps to create ajax based Load More button pagination in laravel:
- Step 1: Install Laravel 9 Application and configure the .env file
- Step 2: Create Model, controller, and seeder file using a single command
- Step 3: Migrate the database and seed dummy data
- Step 4: Create two Route
- Step 5: Create a Controller
- Step 6: Create View file
- Step 7: Run Laravel 9 Application
Step 1: Install Laravel 9 Application and configure the .env file
for this step, you can follow the tutorial "Install laravel 9 from scratch". Else you can simply run the below command:
composer create-project laravel/laravel load-more-button-app
After installing the laravel app you have to create a database and open .env file and configure it like below:
                                                    DB_CONNECTION=mysql
DB_HOST=localhost
DB_PORT=3306
DB_DATABASE=load-more-button-app
DB_USERNAME=root

DB_PASSWORD=root
Step 2: Create Model, controller, and seeder file using a single command
php artisan make:model Post -mscThis single command will create three files Post.php model file inside the App\Models directory, the posts table migration file inside the database\migrations directory, and the PostSeeder.php file inside the database\seeder directory
Step 3: Migrate the database and seed dummy data
Now we have to set up our dummy data in the seeder file PostSeeder.php:
                                                    <?php
namespace Database\Seeders;
use Illuminate\Database\Console\Seeds\WithoutModelEvents;
use Illuminate\Database\Seeder;

use App\Models\Post;

class PostSeeder extends Seeder
{
    /**
     * Run the database seeds.
     *
     * @return void
     */
    public function run()
    {
        $num_users = 80;

        // Use a loop to create multiple users
        for ($i = 1; $i < $num_users; $i++) {
        Post::create([
            'title' => "Test title $i",
            'description' => "Lorem ipsum dolor sit amet consectetur adipisicing elit. Quod consequuntur vero facilis perspiciatis.",
          ]);
        }
    }
}
Now Call it inside DatabaseSeeder.php
                                                    <?php
namespace Database\Seeders;
// use Illuminate\Database\Console\Seeds\WithoutModelEvents;
use Illuminate\Database\Seeder;

class DatabaseSeeder extends Seeder
{
    /**
     * Seed the application's database.
     *
     * @return void
     */
    public function run()
    {
        $this->call([
            PostSeeder::class,
            //other seeder class
        ]);
    }
}
Now run the Bellow command for migration and seeding the data:
                                                    //for migrating the database
php artisan migrate

//for seeding the dummy data
php artisan db:seed
If you want to know more about how to seed dummy data in travel you can follow this tutorial:
Insert dummy data in the database using seeder and with the help of model
Step 4: Create two Routes in the web.php file
Now open resource routes\web.php and define the routes
                                                    <?php
use Illuminate\Support\Facades\Route;
use App\Http\Controllers\PostController;

Route::get('/posts', [PostController::class,'index'])->name('posts.index');
Route::get('/load-more-data', [PostController::class,'loadMoreData'])->name('load.more');

Route::get('/', function () {
    return view('welcome');
});
Step 5: Create a Controller
We have already created our controller file in step 3, now we will define our function in it. open PostController.php from App\Http\Controllers\PostController.php and paste the bellow code:
                                                    <?php

namespace App\Http\Controllers;
use Illuminate\Http\Request;
use App\Models\Post;

class PostController extends Controller
{
    public function index()
    {
        $posts = Post::paginate(5);
        return view('posts.index', compact('posts'));
    }

    public function loadMoreData(Request $request)
    {
        $start = $request->input('start');

        $data = Post::orderBy('id', 'ASC')
            ->offset($start)
            ->limit(5)
            ->get();

        return response()->json([
            'data' => $data,
            'next' => $start + 5
        ]);
    }

}
Step 6: Create View file
Now Create the index.blade.php file in the resources/views/posts folder and paste the below
<!DOCTYPE html>
<html lang="en">
<head>
<meta charset="UTF-8">
<meta name="viewport" content="width=device-width, initial-scale=1.0">
<meta http-equiv="X-UA-Compatible" content="ie=edge">
<title>How to Create Ajax based Bootstrap Pagination in Laravel 9</title>
<link href="https://cdn.jsdelivr.net/npm/[email protected]/dist/css/bootstrap.min.css" rel="stylesheet"
integrity="sha384-rbsA2VBKQhggwzxH7pPCaAqO46MgnOM80zW1RWuH61DGLwZJEdK2Kadq2F9CUG65" crossorigin="anonymous">
<style>
#items_container .content_box div {
box-shadow: 0 0 3px rgba(0, 0, 0, .3);
padding: 15px;
margin-bottom: 20px;
}
</style>
</head>
<body>
<div class="container py-4">
<div class="row">
<div class="col-md-12">
<div class="row" id="items_container">
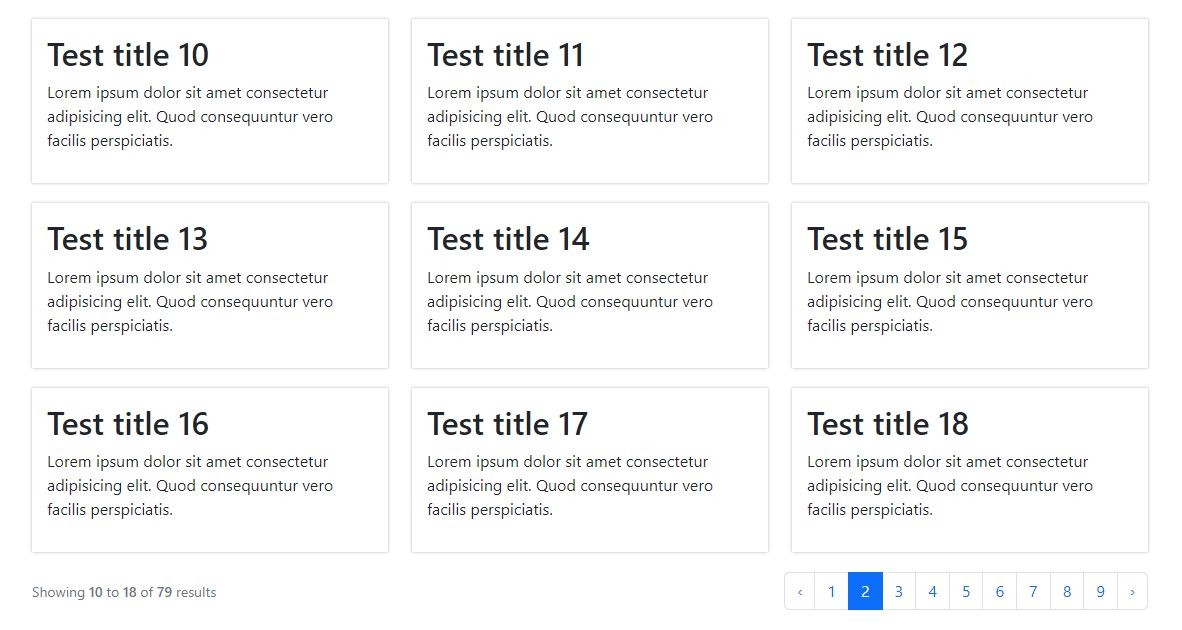
@foreach ($posts as $item)
<div class="col-md-4 content_box">
<div>
<h2>{{ $item->title }}</h2>
<p>{{ $item->description }}</p>
</div>
</div>
@endforeach
</div>
<div class="col-md-12">
<div class="text-center">
<button id="load_more_button" data-page="{{ $posts->currentPage() + 1 }}"
class="btn btn-primary">Load More</button>
</div>
</div>
</div>
</div>
</div>
<script src="https://code.jquery.com/jquery-3.6.4.min.js"
integrity="sha256-oP6HI9z1XaZNBrJURtCoUT5SUnxFr8s3BzRl+cbzUq8=" crossorigin="anonymous"></script>
<script>
$(document).ready(function() {
var start = 5;
$('#load_more_button').click(function() {
$.ajax({
url: "{{ route('load.more') }}",
method: "GET",
data: {
start: start
},
dataType: "json",
beforeSend: function() {
$('#load_more_button').html('Loading...');
$('#load_more_button').attr('disabled', true);
},
success: function(data) {
if (data.data.length > 0) {
var html = '';
for (var i = 0; i < data.data.length; i++) {
html += `<div class="col-md-4 content_box">
<div>
<h2>` + data.data[i].title + `</h2>
<p>` + data.data[i].description + `</p>
</div>
</div>`;
}
//console.log(html);
//append data without fade in effect
//$('#items_container').append(html);
//append data with fade in effect
$('#items_container').append($(html).hide().fadeIn(1000));
$('#load_more_button').html('Load More');
$('#load_more_button').attr('disabled', false);
start = data.next;
} else {
$('#load_more_button').html('No More Data Available');
$('#load_more_button').attr('disabled', true);
}
}
});
});
});
</script>
</body>
</html>
Describing Ajax code bottom of the index.blade.php file:
This is a JavaScript function that is triggered when the "#load_more_button" is clicked. It makes an AJAX request to the "load.more" route in the Laravel application with a "start" parameter to determine where to start loading data from.
Before sending the AJAX request, the button text is changed to "Loading..." and the button is disabled to prevent multiple clicks. Once the AJAX request is successful, the button text is changed back to "Load More" and the button is enabled again.
If there is data available, it is looped through to generate HTML markup and appended to the "#items_container" div. The HTML is hidden by default and then fades in with a duration of 1000ms. The "start" variable is also updated with the next starting position for the next AJAX request.
If there is no more data available, the button text is changed to "No More Data Available" and the button will be disabled.
Step 7: Run the Laravel 9 application
Now run the command below to run the app:
php artisan serve
Now open http://127.0.0.1:8000/posts or http://localhost:8000/posts
If you are using this code after downloading from here make sure to run the bellow command after downloading and before doing anything.
composer install
-
 abdul
abdulNice tutorial